
Why Chains Skip Under Load But Not at Rest
MTB drivetrain problems have gotten complicated with all the conflicting advice flying around. Replace the cable. Adjust the limit screws. Blame the derailleur. And yet your chain still launches off the cog every time you actually push hard.
As someone who spent two full seasons chasing a ghost through my rear derailleur, I learned everything there is to know about load-specific chain skip. Today, I will share it all with you.
Here’s the mechanical reality — slack and wear hide at rest. The moment you apply actual pedaling force, not just spinning lazily down a fire road, every millimeter of chain stretch and every worn cog tooth amplifies instantly. The chain either sits on the gear or it doesn’t. No middle ground.
I kept tweaking the barrel adjuster. Replaced cables twice. Cursed Shimano extensively. Turns out my chain was sitting at 0.8% stretch and my cassette cogs looked like shark teeth. Don’t make my mistake.
The four culprits behind load-specific skip are:
- Stretched chain — past 0.75% elongation
- Worn cassette cogs — hooked or shark-toothed teeth
- Cable tension drift — subtle misalignment that only shows under pressure
- Bent derailleur hanger — even 1–2mm throws off indexing under load
Most generic guides tell you to spin the barrel adjuster and call it done. That works maybe 20% of the time. The other 80% requires actually isolating which component is failing — which is a different process entirely.
Step 1 — Check Chain Wear Before Anything Else
Start here. Not with the derailleur. Not with cable tension. The chain.
But what is chain wear, exactly? In essence, it’s elongation of the chain’s internal links from metal-on-metal friction. But it’s much more than that — it’s the invisible damage quietly destroying your cassette every single pedal stroke.
A chain wear indicator tool costs $8–15 and takes literally ten seconds to use. The Park Tool CC-3.2 has two notches — 0.5% and 0.75%. Slip it onto a chain link. If it drops into the 0.75% slot, the chain is dead. Buy a new one immediately. Sitting between the two notches means you’re in warning territory, and your cassette is probably already compromised.
The 0.5% mark is where you should have replaced it yesterday. At 0.75%, cassette teeth are actively deforming. A fresh chain dropped onto a cassette worn by a stretched chain will skip anyway — the tooth spacing no longer matches. That’s what makes this problem so endearing to us frustrated MTB riders who keep buying parts and getting nowhere.
No tool handy? Grab the chain at the largest cog and pull it straight away from the chainring. A healthy chain lifts maybe 1–2mm. A worn chain pulls away a half-inch or more. Not precise, but revealing.
Chain under 0.5%? Move to the cassette check. Over 0.75%? Buy a new chain and cassette together. Seriously. I learned this the expensive way — $40 chain, still skipping, then another $45 cassette a week later. Just buy both.
Step 2 — Inspect the Cassette for Shark-Tooth Wear
Worn cassette cogs look exactly like the back teeth of a shark — hooked forward, aggressive, completely asymmetrical. New cogs are rounded symmetrically on top. That visual difference is everything.
The middle cogs wear fastest. That’s where most riders spend roughly 80% of their time. Your smallest and largest cogs are often fine even on a completely trashed cassette — which is exactly why skip tends to happen only in your middle gears and nowhere else.
Spin the wheel by hand and scan cogs 5 through 8 on a 10-speed cassette — or 7 through 10 on 11-speed. Look for asymmetry. Run a finger up the trailing edge of each tooth. A sharp hook means replacement time, full stop.
Here’s what kills riders. They replace a worn chain, install it on a worn cassette, and the skip gets worse. The new chain drops deeper into those hooked old teeth and bounces around like wire on pegs. They assume the new chain is defective. They waste another $40. I’m apparently extremely good at making this exact mistake, and the Park Tool CC-3.2 works for me now while guessing never does.
Multiple hooked middle cogs? Replace the cassette. A SRAM PG-1050 runs $35–50. Shimano HG500 is similar pricing. Worth every cent to stop rage-quitting climbs at the 400-meter mark.
Step 3 — Tune Cable Tension and Check the Hanger
So, without further ado, let’s dive into the actual tuning portion — which is where most guides start, even though it probably shouldn’t be step one.
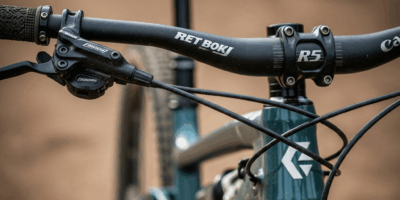
Grab a 4mm Allen wrench and find the barrel adjuster on your derailleur cable. It’s either on the shifter body or at the derailleur itself, depending on your setup.
The rule is simple: skip in higher gears (smaller cogs) = add tension; skip in lower gears (bigger cogs) = release tension. Quarter-turn increments only. Let the cable settle between each adjustment. Spin the pedals under light load and shift before making another move.
Most skips resolve in two or three quarter-turns. Past five turns in either direction? Stop entirely. Something structural is wrong.
That something is usually the derailleur hanger. Every MTB frame runs an aluminum or steel hanger bolted into the dropout — holding the derailleur in precise position. One rock strike. One hard bag drop at the trailhead. One rogue stick at speed, and that hanger bends 1–2mm forward or back. That’s enough to wreck shifting under load entirely. That was never the cable.
Frustrated by random skipping across multiple gears, many riders spend hours adjusting cable tension using a barrel adjuster and a prayer. Check the hanger first. Consistent skip in one specific cog points to cassette wear. Random skip across different gears on different rides points to cable drift or hanger issues.
A derailleur hanger alignment tool — Feedback Sports makes one for around $70 — handles this at home. A shop alignment runs 15 minutes and $15–25. While you won’t need the $70 tool for a one-time fix, you will need a handful of shop visits before DIY starts making financial sense.
How to Tell Which Fix You Actually Need
Probably should have opened with this section, honestly. Here’s your decision tree:
Skip happens only in one or two specific cogs: The cassette is worn. Replace it.
New chain installed and skip happens everywhere: Your cassette was worn first. Replace it too. The chain alone won’t fix load-specific skip on a trashed cassette — not even close.
Skip is random across different gears each ride: Cable tension or hanger alignment is the issue. Barrel adjuster tuning fixes cable drift. A bent hanger needs alignment tools or a shop visit.
Replaced chain and cassette and skip persists: Check hanger alignment first, then cable tension. In that order.
Once the fix is in, go ride hard. Real climbs. Real efforts. Skip gone? You isolated it correctly. Skip returns? Work the tree again — two stacked issues are more common than anyone admits, especially after a rough season.
First, you should replace your chain every 1,500–2,000 miles — at least if you ride in wet or muddy conditions regularly. Wet riding trashes chains fast. Dry conditions let you stretch toward 2,000 miles comfortably. Catching wear before 0.75% stretch saves your cassette every time. That is because a worn cassette costs $35–50 and a chain costs $15 — the math on replacing chains early is embarrassingly obvious in hindsight.


Stay in the loop
Get the latest trail rise updates delivered to your inbox.