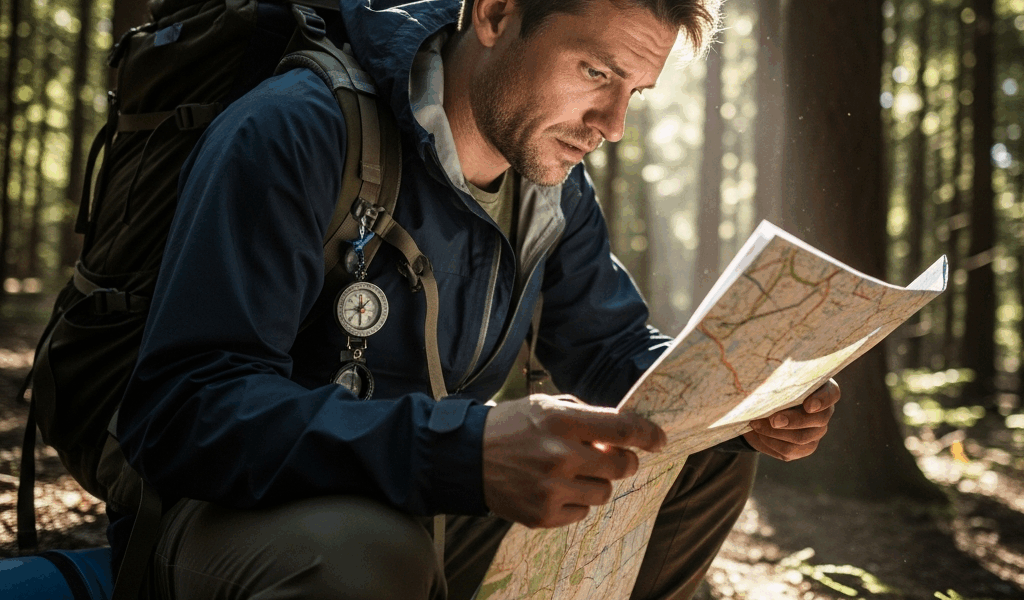
What to Do If You Get Lost on a Hike — Survival Steps That Work
Getting lost on a hike has gotten complicated with all the bad advice flying around. “Just follow the sun.” “Head downhill.” “Your instincts will kick in.” They won’t — not reliably, anyway. As someone who’s spent fifteen-plus years hiking everything from weekend loops in the Appalachians to multi-day slogs through the Cascades, I learned everything there is to know about what actually happens when a trail stops making sense. Smart people fall apart. Capable people make terrible decisions. Not because they’re weak — because nobody handed them a real plan before they needed one. This is that plan.
STOP — The First Four Things to Do
The STOP method isn’t some new backcountry trend. Search and rescue teams have been hammering this framework for decades — and honestly, it keeps showing up because it keeps working. What it actually does is interrupt the panic spiral before you turn a bad afternoon into a genuine emergency.
STOP: Stop, Think, Observe, Plan. Simple letters. Not-so-simple to execute when your heart rate is spiking and the trees all look identical.
Stop — Physically Stop Moving
The second you realize you don’t know where you are, sit down. Not in a minute. Not after you check around the next bend. Now. Every step you take while disoriented is potentially a step that needs to be undone — and in thick terrain, a quarter mile of confused wandering compounds into hours of backtracking fast.
Don’t make my mistake. On a solo trip in the Great Smoky Mountains back in 2017, I was sure the trail was just ahead. It wasn’t. I wandered — I’m embarrassed to admit this — forty-five minutes in the wrong direction before I stopped lying to myself. Those forty-five minutes turned into three hours of backtracking in the dark, on a headlamp I hadn’t planned to use. Sit down first. Every time.
Think — What Do You Actually Know?
Take an honest inventory. When did you last see a trail marker — a blaze on a tree, a cairn, a signpost? Ten minutes ago? An hour? What direction were you generally heading? What does the terrain around you suggest about where you are relative to where you started? Here’s the thing most lost hikers don’t realize: you probably know more than you think. The majority of people who consider themselves “lost” are within a quarter mile of the trail. Think before you take a single step.
Observe — Use Your Eyes
Look for landmarks you can actually name — a ridgeline, a peak, a drainage. Listen for running water. Check where the sun is sitting; afternoon sun tracks west, morning sun east. Basic stuff, but it matters out there. Look for worn soil, broken branches, the subtle compression of ground that indicates foot traffic. These details are visible when you stop moving and actually pay attention to them.
Plan — Make a Real Decision
Based on what you know and what you’ve observed, commit to something specific. Not a hopeful wander. An actual decision — “I’m walking northeast toward that ridgeline for ten minutes, and if the trail doesn’t appear, I’m coming back to this exact spot and staying put.” Mark where you’re standing: a rock cairn, a bandana on a branch, whatever you’ve got. Then execute.
Use Your Phone Before the Battery Dies
Probably should have opened with this section, honestly. Your phone is the most powerful survival tool in your pack — and most hikers have no idea how to actually use it when things go sideways.
But what is your phone’s GPS, really? In essence, it’s a satellite receiver that has nothing to do with cell towers. But it’s much more than that. Zero bars on your screen doesn’t mean zero location data. Open Google Maps, Apple Maps, any navigation app — your blue dot appears because your phone is talking to satellites orbiting overhead, not to Verizon. The map tiles might not load. Your position absolutely will.
Download Offline Maps Before You Go
Apps like AllTrails Pro ($35.99/year) and Gaia GPS ($39.99/year) let you pull full trail maps onto your phone’s local storage before you leave the house. No signal required, no data, nothing. You can see the trail, your exact position, surrounding terrain — all of it, in the middle of nowhere. This isn’t optional gear anymore. It’s table stakes for anyone setting foot on a trail.
No app? Fine. Bare minimum: screenshot the trail map before you leave the trailhead. High zoom, full trail visible, intersections included. It takes ten seconds. A hiker I know got turned around on a foggy morning in the Cascades and navigated out entirely from a screenshot she’d taken at the parking lot. Not glamorous. Completely effective.
Texting 911 With Your Coordinates
In most of the U.S., you can text 911 — and if you have any signal at all, even a fleeting bar, a text will route through towers that voice calls can’t reach. Pull up your location, note the coordinates (something like 35.6892° N, 83.5271° W), and text that directly to dispatch. Many centers can pinpoint that location within meters.
If you carry a Garmin inReach Mini 2 ($349.99) or a SPOT device, use it now. Satellite messengers work anywhere with a clear view of sky — full stop. Worth every dollar if you hike solo.
Conserve Battery
Low power mode, immediately. Kill WiFi and Bluetooth — they’re burning battery searching for connections that don’t exist out there. Drop screen brightness as far as it’ll go. If you have a battery pack in your bag — I carry an Anker PowerCore 10000, runs about $22 — plug your phone in now. Not when you hit 5%. Now.
Mark Your Location and Stay Put
Staying put feels completely wrong. Every instinct says move, act, fix it. That’s the instinct that gets people hurt. Search and rescue teams are extraordinarily good at finding people who stay in one place. Moving targets in dense, unpredictable terrain? Much harder.
A hiker I know — stranded by fading light on a trail outside Bend, Oregon — sat down on a log, pulled out her Fox 40 whistle, and blew three blasts every fifteen minutes until a SAR team walked up to her roughly four hours later. Her hiking partner panicked, walked out in what he was sure was the right direction, spent the night wet and cold in the forest, and got found the next morning — dehydrated, hypothermic, deeply annoyed with himself. Same starting situation. Wildly different outcomes. That’s what makes “stay put” so endearing to us hikers who’ve seen both scenarios play out.
Make Yourself Findable
Three whistle blasts is the universal distress signal. A Fox 40 Classic costs $6 and carries over a mile through thick trees. Blow it, wait, blow again. Anyone who knows wilderness signals will respond.
Move to an open area if you can do it without risk — a clearing, a rocky outcrop, a ridgeline. Spread bright gear on the ground. An emergency mylar blanket reflects sunlight and shows up clearly from aircraft. In snow, stomp out large letters or an X pattern with logs or rocks. These are recognized distress signals from the air, and they work.
Shelter and Water First
If night is coming — warmth over everything. A SOL Emergency Blanket weighs 1.6 oz, costs $5, and reflects roughly 90% of your body heat back at you. Get out of wind. If you’re wet, staying put while wet still beats walking wet in the dark through unknown terrain. Eat something. Drink what you have. Your decision-making degrades fast when your core temperature drops, and a Clif Bar buys you more clarity than most people realize.
Self-Rescue — When and How to Walk Out
Walking out makes sense under specific conditions: you’re genuinely confident about direction, daylight remains, you have water, and staying put poses a real and immediate risk — rising water, exposure with no shelter, deteriorating weather with nowhere to wait it out. If all of that is true, move.
Follow Water Downhill
Find a stream and follow it down. Roads are built near water — towns are built near roads — and civilization almost always sits downstream. It’s slower than a straight shot through the forest, but infinitely more reliable than guessing. Keep the water in sight or earshot and keep moving.
Use Ridgelines for Navigation
High ground gives you visibility. From a ridgeline you can spot roads, buildings, clearings, power line cuts — landmarks that are invisible from inside the forest. Travel is easier too; dense underbrush at lower elevation will absolutely wreck your pace and your morale.
Never bushwhack through thick forest at night. I’ll say it plainly: never. The injury risk alone makes it a bad trade — ankle rolls, face-level branches, complete loss of direction — and exhaustion compounds every bad decision that follows. No reliable heading plus no solid daylight means you stay put. Full stop.
Prevention — What to Carry on Every Hike
Probably should have mentioned this earlier too, honestly. The ten essentials exist because search and rescue professionals kept a running list of what people didn’t have when they desperately needed it. Here’s that list adapted for day hikers — stripped of the overkill gear, kept to what actually matters on a five-mile trail.
- Navigation — Downloaded offline maps on your phone plus a trailhead screenshot. For remote hiking, add a paper topo map and a $15 baseplate compass. Both weigh almost nothing.
- Whistle — Fox 40 Classic or any pea-less design. $6. Lives on your hip belt or jacket pocket permanently — not buried in your pack.
- Headlamp — A Black Diamond Spot 400 runs $34.95 and throws 400 lumens. Bring it on every hike, even the ones you’re certain end by noon. Plans change. Ankles twist.
- Emergency blanket — SOL Emergency Blanket. 1.6 oz. Fits in a shirt pocket. There is genuinely no excuse to leave this behind.
- Water and a way to make more — At minimum 2 liters on your back. A Sawyer Squeeze filter ($29.99, about 3 oz) lets you drink from any stream you find.
- Food — More than you think you’ll need. Two Clif Bars and a bag of trail mix sounds like nothing until it’s the thing keeping your brain functional at hour six.
- First aid kit — Adventure Medical Kits Ultralight ($25) handles blisters, cuts, and sprains — the stuff that actually happens on day hikes.
- Battery pack — Anker PowerCore 10000. $22. Keeps your phone alive when everything depends on it.
- Warmth and rain layers — A lightweight shell and a fleece or packable down layer. Mountain weather shifts in under an hour — apparently faster than most first-timers expect.
- Fire starter — A Bic lighter and a small bag of dryer lint or tinder tabs. Warmth, signaling, and honestly, morale.
The whole kit fits in a 20-liter daypack with room left over. Total weight under two pounds. Buy everything new — under $150, most of it lasting a decade. That’s an almost absurdly small investment relative to what it covers.
Getting lost isn’t a failure — it happens to experienced hikers, to people who’ve run the same trail twenty times, to people who know the area cold. What separates a scary afternoon from something genuinely terrible is having a plan before you need one. Stop moving. Use your phone. Stay visible. Walk out only when you’re sure. Carry the kit. That’s the whole thing.



Stay in the loop
Get the latest trail rise updates delivered to your inbox.