Off-bike training has gotten a lot of attention in mountain biking circles over the past few years, but most riders still skip it. As someone who resisted gym work for years and then finally started doing it consistently, I learned that the strength gains transferred to the trail faster than I expected and in more specific ways than I thought possible. Here’s what actually matters and what to skip.
Why Gym Work Transfers to the Trail
Mountain biking demands strength that cycling alone can’t develop. Riding produces significant quad and glute fatigue, but the surrounding muscles — hip abductors, hamstrings, the posterior chain — get relatively little stimulus from pedaling. These underworked muscles are exactly the ones that prevent knee injuries, stabilize the pelvis on technical terrain, and absorb the impact of rough riding.
The muscles that protect you in a crash — rotator cuff, upper back, wrist flexors, deep core — are also not meaningfully trained by riding. Off-bike work fills these gaps in ways that matter both for performance and longevity in the sport.
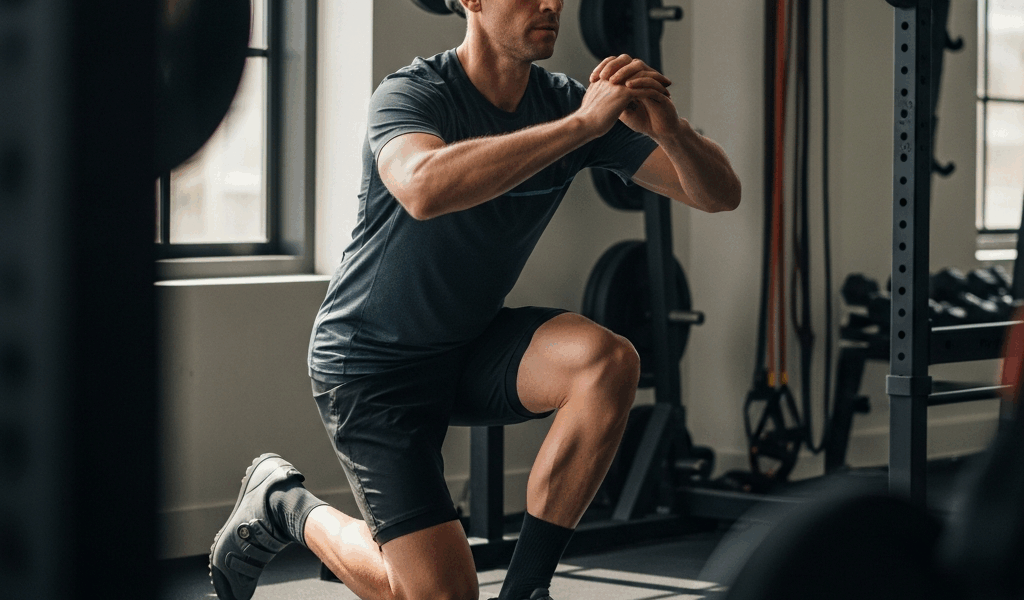
Single-Leg Squat (Bulgarian Split Squat)
The single best exercise for mountain bikers. It trains each leg independently, identifies and corrects the left-right strength imbalances that are nearly universal in cyclists, and loads the glutes and hamstrings in the extended hip position that matters for both climbing power and injury prevention. I’m apparently stronger on my right side than my left by about 15%, which I never would have known without this exercise — and which explains some quirks in my climbing position.
Setup: rear foot elevated on a bench, front foot far enough forward that your knee tracks over your toes in the lowered position. Lower until your rear knee nearly touches the floor. Drive through your front heel to return. Three sets of 8–10 reps per leg. Add weight with dumbbells in each hand as you get stronger.
Romanian Deadlift
The RDL trains the posterior chain — hamstrings and glutes — in a hip-hinge pattern that directly mirrors the athletic stance you hold on a mountain bike. Strong hamstrings also balance the quad dominance that develops from cycling, which is probably the single best thing you can do to reduce knee injury risk over a career of riding.
Hold dumbbells or a barbell at your thighs. With a soft knee bend, push your hips back and lower the weight along your legs until you feel a strong stretch in the hamstrings (around mid-shin for most people). Drive hips forward to return. Three sets of 8 reps. The weight should be challenging but not forcing your lower back to round — neutral spine throughout is the non-negotiable.
Lateral Band Walks
Hip abductor weakness is the most common muscular deficit in cyclists and the primary cause of IT band syndrome, lateral knee pain, and hip instability on the bike. Lateral band walks directly target the gluteus medius — the stabilizing muscle on the outer hip that almost nobody trains.
Place a resistance band just above your knees. Squat slightly and walk sideways, maintaining constant tension in the band. 20 steps each direction, three sets. These are harder than they look. If you feel nothing, the band is too light — use a real loop band, not a therapy band from the physical therapist’s drawer.
Push-Up Variations and Rows
Upper body pushing and pulling strength absorbs impact on rough terrain and prevents shoulder injuries in crashes. Push-ups (progress to weighted push-ups or ring push-ups) build chest, shoulder, and tricep strength. Rows — dumbbell row, cable row, or resistance band row — build the upper back that maintains riding position under fatigue and protects the shoulder through rough terrain.
Equal push and pull volume prevents the shoulder imbalances that lead to rotator cuff issues. If you’re doing push-ups with no rows, you’re building an imbalance. Three sets of 10–12 each, twice per week, is the minimum that makes a difference.
Plank and Anti-Rotation Core
The core’s job on a mountain bike isn’t to crunch — it’s to resist rotation and extension under load. Planks, side planks, and Pallof presses train this anti-rotation function directly. That’s what makes them so specific to trail riding — you’re training the exact type of muscle contraction that holds your position through a rock garden or g-out. Three sets of 30–45 second front planks and 20–30 second side planks per side is a solid starting point.
Programming
Two strength sessions per week during riding season is the target. Each 45–60 minutes. Prioritize the lower body compound movements first (split squats, RDLs), then single-leg and hip work, then upper body and core. Reduce volume in peak riding weeks but don’t stop entirely — maintaining strength requires less stimulus than building it, which means two sessions of reduced volume keeps everything you built without generating significant additional fatigue.


Stay in the loop
Get the latest trail rise updates delivered to your inbox.