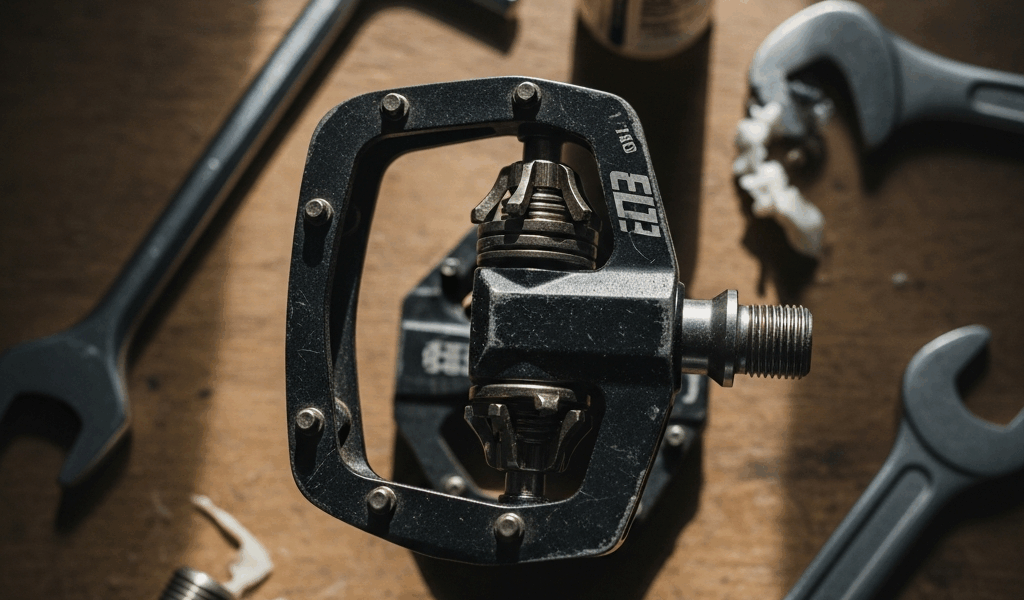
Why MTB Pedals Slip or Come Loose
MTB pedal problems have gotten complicated with all the conflicting advice flying around. As someone who has pushed a bike three miles out of Sedona with a pedal spinning like a loose tooth, I learned everything there is to know about this subject. Today, I will share it all with you.
But what is a “loose pedal” problem? In essence, it’s either your spindle coming undone from the crank arm or your foot losing grip on the platform. But it’s much more than that — it’s at least four distinct failure modes that most riders lump into one.
The two main camps: mechanical looseness and traction failure. Mechanical looseness means the spindle is physically separating from the crank. Thread issue, bearing issue, or both. Traction failure means your foot slides off the platform on flats — or you’re ejecting from clipless cleats way too early.
Here’s the trap. The left pedal has a reverse thread. Intentional design — it stops the pedal from unscrewing as you ride. Tighten it like a normal right-side pedal, though, and you’re actually loosening it. I did this. Took me an embarrassingly long time to figure out. Don’t make my mistake.
Flat pedals use pins for grip. Clipless pedals rely on cleat tension and spring mechanics. Both systems wear out with enough trail time. Neither needs a frame-off teardown if you catch the problem early. That’s what makes diagnosing this stuff so satisfying to us riders — small fixes, big results. So, without further ado, let’s dive in.
Step 1 — Figure Out Where the Problem Is
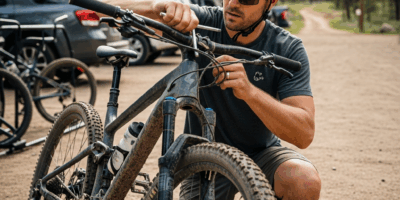
Probably should have opened with this section, honestly. Before grabbing any tools, sit on the bike and push on each pedal laterally. Do both sides — especially if the left one feels off.
Ask yourself one question: is the whole pedal moving inside the crank arm, or is your foot sliding around on top of the pedal?
- Whole pedal is wobbly, loose, or rotating in the crank — Spindle issue. Jump to spindle fixes.
- Foot sliding on flat pedal platform — Pin wear or sole wear. See flat pedal section.
- Cleats popping out without full unclip motion — Cleat tension, alignment, or bearing preload. See clipless section.
- Pedal feels mushy or unresponsive on unclip — Worn bearing or spring mechanism. Likely needs service or full replacement.
This self-sorting saves real time. You won’t burn 45 minutes adjusting cleat tension only to discover the spindle threads were stripped the whole time.
Fixing a Loose or Wobbly Pedal Spindle
A wobbly spindle is fixable in most cases — at least if the crank threads aren’t already chewed up. Grab a 6mm or 8mm hex key depending on your pedal model, and a torque wrench.
Target torque is around 35 Nm. I’m apparently a chronic under-tightener, and my Park Tool TW-6.2 click wrench works for me while guessing by feel never does. Skip the torque wrench and you’ll either leave it too loose or strip the threads entirely.
Before tightening anything, clean the spindle threads — a stiff brush or a quick blast of compressed air works fine. Grit packed into those threads makes torque readings useless. Follow that up with a thin coat of grease or anti-seize on the spindle. Prevents corrosion and gives you an honest read on how tight you’re actually going.
Left pedal: reverse thread. Tighten it counter-clockwise. I still pause every single time to think through this, so no shame in needing a mental reset before you touch it.
Once it’s torqued, pedal hard on flat ground for about 20 seconds and recheck. Spindles settle slightly after initial load — a normal thing.
Still loose after that? Look at the crank arm hole. Stripped threads look rough and chewed, sometimes with small aluminum flakes visible. Clean hole, spindle tightens, still wobbles — that points to worn bearing preload inside the pedal body itself. That’s either a full bearing service if your pedal supports it, or a replacement.
Stripped crank threads aren’t a death sentence. A helicoil insert runs about $15 and takes maybe 30 minutes with the right tap kit. Or you replace the crank arm — anywhere from $60 to $200 depending on your build.
Fixing Flat Pedal Grip and Pin Issues
Frustrated by sketchy foot feel on rough descents, a lot of riders immediately blame the pedal body itself. Usually the pins are just worn smooth — after a season or two of hard use on granite and roots, that’s completely expected.
Flat pedal pins should stick up roughly 2 to 3mm above the platform surface. Look at the platform straight-on. Flush pins, barely-there pins — that’s your grip problem right there. Normal wear item, not a manufacturing defect.
Replaceable pins or not? Shimano Deore XT flats have replaceable pins. Many budget platforms don’t. Check before you go looking for a pin kit. If yours are replaceable, a fresh set runs $15 to $25. Small Allen wrench, 10 minutes per corner, done. Check the pedal manual for model-specific sizing — most take a 2mm hex.
Non-replaceable pins mean two options: buy a new pedal ($40 to $150) or accept the reduced grip. Some riders intentionally run cheaper flats knowing they’ll swap the whole thing once the pins go, rather than dealing with re-pinning every season.
Real talk, though — your shoes matter just as much as the pins. I’m apparently a slow learner on this front, and worn-out rubber soles cost me a lot of confidence on technical trails before I figured it out. Fresh sticky-rubber riding shoes can feel like a complete pedal upgrade even with no hardware changes at all.
Mud and rain drop grip temporarily no matter what. On those days the conditions are the problem, not the platform.
Fixing Clipless Pedals That Slip or Release Early
Clipless slip comes down to three culprits: worn cleats, loose release tension, or a bearing that’s past its service life. This new problem takes off gradually and eventually evolves into the full-blown unplanned ejection enthusiasts know and dread on technical climbs.
Start with the cleats. Pull the shoe off and look at the metal contact plate. Chipped, cracked, or rocking loose — any of that and the cleat won’t hold the pedal spring reliably. Most cleats survive one to two seasons depending on conditions and how much you’re walking in them. SPD two-bolt and SPD-SL three-bolt are the standards you’ll find at any shop.
New cleats run $25 to $50. Two or three bolts, 4mm hex key in most cases — maybe a 2mm on older SPD hardware. Orient the metal plate so it slides into the pedal cage smoothly before torquing anything down.
Tension adjustment is next. Look at the back of the pedal body — there’s a small screw, usually Phillips or 2mm hex. That’s the release tension adjuster. Clockwise increases tension, counter-clockwise loosens it. A quarter turn makes a noticeable difference. Popping out early? Turn it clockwise. Stay within one full turn of where you found it — manufacturers set those ranges for a reason.
SPD pedals usually have this screw on the outer edge. SPD-SL puts it on both sides in some models, heel-side in others. Check your specific model if you can’t find it immediately.
Alignment matters more than most people expect. Cleat positioned too far forward or back creates instability — and early release even with tension cranked up. A straightedge laid across the shoe works fine for checking. The goal is natural foot position sitting directly over the pedal axle.
While you won’t need a full workshop rebuild, you will need fresh cleats, a correctly adjusted tension screw, and good alignment before calling the pedal itself the problem. First, replace the cleats — at least if they show any visible chipping or wobble when you push them by hand. Rebuilt pedals might be the best option next, as worn spring mechanisms require consistent spring force to hold safely. That is because a stretched spring can’t maintain tension regardless of what the adjustment screw says.
New pedals run $100 to $300. Rebuilt units, $50 to $120.
One last thing — and I say this as someone who has destroyed two sets of SPD cleats by ignoring it. Walking on clipless shoes wears the metal contact plate unevenly, fast. Change into regular shoes for anything that isn’t actually riding. That’s it. That’s the whole tip.


Stay in the loop
Get the latest trail rise updates delivered to your inbox.