Hiking Poles — Do You Actually Need Them and How to Use Them Right
Hiking poles have gotten complicated with all the gear-bro noise flying around. Every article tells you to buy them immediately. Every YouTube video has an affiliate link in the description. And somewhere buried underneath all that, there’s an actual question worth answering — do you need them, for the hikes you do? Probably not always. That’s the honest answer, and I’m aware it doesn’t make for great click-through rates.
As someone who has hiked with poles, without poles, lost one down a ravine in the Cascades, and once hauled two fully extended poles for eight miles on a flat rail trail while feeling deeply ridiculous — I learned everything there is to know about when these things actually matter. Spoiler: it’s terrain-dependent, body-dependent, and nobody selling poles wants to tell you that.
The Honest Answer — It Depends on the Terrain and You
Most articles about hiking poles say yes immediately. That’s because most of those articles exist to sell poles — either through affiliate links or because a gear brand wrote them. I’m not saying poles are bad. I own two pairs. But the blanket recommendation frustrates me every time.
Here’s the actual breakdown.
Flat day hikes on maintained trails? You probably don’t need them. A five-mile loop through a state park with a light daypack isn’t a situation that demands trekking pole support. Plenty of experienced hikers — people who’ve logged thousands of trail miles — make the deliberate choice to leave poles at home on easy terrain. That’s not a beginner mistake. That’s good judgment about what the day actually calls for.
Steep descents when your knees are a known issue? Absolutely bring them. Studies have measured up to a 25 percent reduction in compressive knee force on downhill sections when poles are used correctly. That’s not a marginal number. For anyone with existing knee problems, that difference shows up within the first mile of descent — sometimes sooner.
Long-distance backpacking with a loaded pack — anything over 35 pounds, say — poles shift a meaningful percentage of that load onto your arms and shoulders. On a three-day trip, that redistribution adds up to real fatigue savings in your legs. Your pace stays more consistent on day two and day three than it would otherwise.
So the terrain and your physical situation matter more than any universal rule. Read that sentence again before you buy anything.
When Poles Make the Biggest Difference
There are specific conditions where I reach for poles without hesitation. These aren’t edge cases — they come up on ordinary hiking trips, honestly more often than people expect.
Steep Downhill Sections
This is where poles earn their keep more than anywhere else. Planting a pole ahead of you on a descent slows your momentum and distributes impact — your quads take less of a beating, your knees stay protected from the repetitive loading that turns a six-mile hike into a three-day recovery situation. If your route involves significant elevation loss, especially the back half of a summit, poles are worth the weight. No question about it.
Stream Crossings
Humbled by a knee-deep crossing on the Enchantments Trail in Washington — one I thought looked totally manageable — I started keeping poles extended even on sections where I figured I didn’t need them. Moving water reads depth wrong. Rocks are slippery in ways you can’t anticipate standing on the bank. Two extra points of contact during a crossing isn’t overcaution. It’s the difference between wet boots and a soaked pack — or worse.
Snow and Ice
Early season or high-elevation routes with snowpack are genuinely dangerous without stability support. Poles give you that. They’re not a substitute for crampons on technical terrain, but on packed snow traverses or icy morning trail sections, a planted pole can stop a slide before it becomes a problem. Apparently a lot of people skip this and find out the hard way.
Heavy Pack Situations
A loaded backpacking pack changes your center of gravity — sometimes dramatically. On technical footing, talus fields, root networks, uneven rock, that shift matters more than you’d think. Poles extend your proprioceptive reach, which is a fancy way of saying your body knows where it is in space more accurately. Balance improves. Ankle rolls happen less. That’s a worthwhile trade on a multi-day trip.
When You Can Skip Them
Probably should have opened with this section, honestly. Because for a lot of hikers reading this, poles are genuinely optional — and nobody in the gear industry has much financial incentive to say so.
Short hikes on well-maintained trails don’t require poles. If the trail is marked, graded, and free of significant obstacles, your two legs are doing just fine on their own. The human body navigated trails without carbon fiber stick assistance for a very long time.
- Day hikes under eight miles with minimal elevation change
- Trails with paved or gravel sections
- Hikes where you’re carrying under 20 pounds
- Routes you know well with no technical sections
- Situations where your hands need to be free — scrambling, photography, leashing a dog on tight switchbacks
Strong knees and good balance also change the calculus. A 28-year-old with no joint history and solid trail experience is not the same hiker as a 55-year-old recovering from a meniscus repair. Gear recommendations that ignore this difference aren’t useful recommendations — they’re just general-audience content dressed up as advice.
I’ve watched experienced thru-hikers on the Pacific Crest Trail make deliberate decisions to carry no poles for entire sections — because the weight and management hassle outweighed the benefit on that particular stretch. These aren’t people who don’t know better. They know exactly what they’re doing.
How to Use Poles Properly — Most People Get This Wrong
Here’s where I need to be direct: I used poles incorrectly for the first two years I owned them. Had absolutely no idea. My wrists ached after long days and I assumed it was just part of the deal — some kind of inevitable pole tax.
It wasn’t. I was using the straps wrong. Don’t make my mistake.
Strap Usage
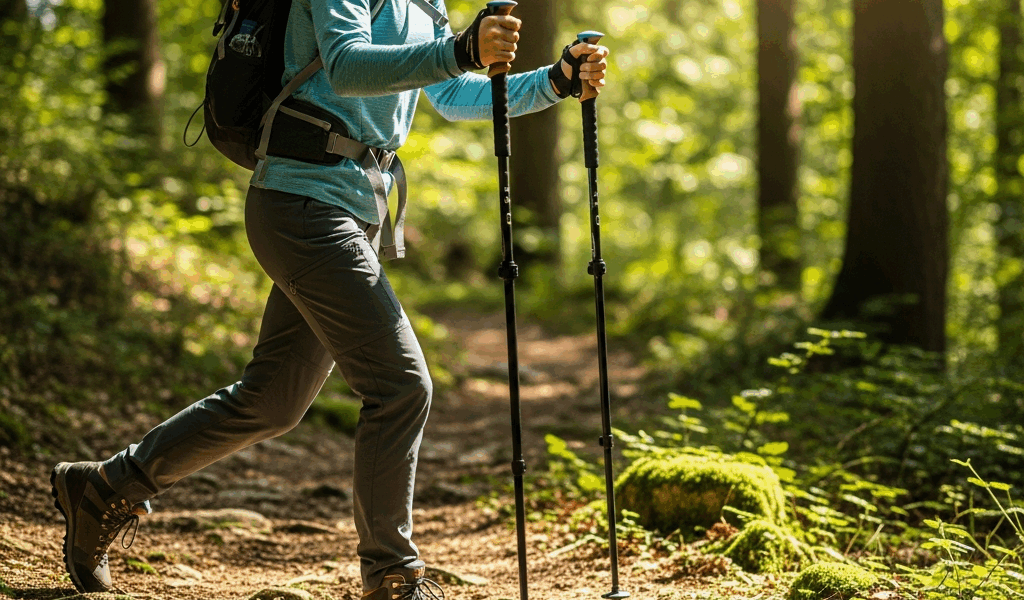
The single most common mistake. Most people thread their hand through the strap from above, like grabbing a bag handle. Wrong. Thread your hand up through the strap from below — so the strap runs across your palm and between your thumb and forefinger. Then grip the handle lightly. The strap should support the pole on the plant phase, not your grip strength. Your hand should be relaxed. This one change eliminated my wrist soreness completely within a single hike. One hike.
Height Adjustment
For flat terrain, adjust so your elbow sits at roughly 90 degrees when the pole tip is planted on the ground next to your foot. On steep uphills, shorten the poles five to ten centimeters. On steep downhills, lengthen them by the same. Most people set their poles once at the trailhead and never touch them again — which means they’re getting the wrong configuration for most of the hike. Adjust for terrain. It takes about eight seconds.
Pole Plant Timing
Plant the right pole with the left foot. Plant the left pole with the right foot. This is the natural cross-body pattern that matches your walking gait and keeps your stride balanced. When people plant the same-side pole and foot together, they disrupt their natural movement pattern — and the poles stop doing useful work. They become expensive walking decorations at that point.
On Descents Specifically
Plant both poles slightly ahead of your body before stepping down. Let them absorb the initial load. Don’t plant behind you on a descent — that actually increases knee stress rather than reducing it, which defeats the whole purpose of bringing poles in the first place.
Buying Considerations If You Decide Yes
This isn’t a full gear review. But what is a buying decision for hiking poles? In essence, it’s choosing between a few material and design tradeoffs that actually matter — and a bunch that don’t. But it’s much more than that if you let the marketing get to you, so here’s what to actually pay attention to.
Carbon vs Aluminum
Carbon poles are lighter — something like the Black Diamond Distance Carbon Z comes in around 9.2 ounces per pair. Aluminum poles, like the REI Co-op Passage or the Black Diamond Trail, weigh closer to 18 to 20 ounces per pair but cost significantly less and survive abuse better. Carbon snaps under lateral stress. Aluminum bends. If you’re a weekend hiker who isn’t counting grams obsessively, aluminum is the rational choice. Serious long-distance backpackers often pay the weight penalty anyway — that’s their call to make.
Folding vs Telescoping
Folding poles pack down smaller — useful for stuffing into a pack on sections where you’re not using them, and faster to deploy when you need them. Telescoping poles offer more granular length adjustment, which matters if you’re fine-tuning constantly for terrain changes. For most hikers, either works. Folding mechanisms do add a small failure point over time, worth knowing before you buy.
Cork vs Foam Grips
Cork grips — the kind you find on poles like the Leki Micro Vario Cork — absorb moisture and conform to your hand shape over time. Foam grips are lighter and warmer to the touch in cold weather but wear down faster. Rubber grips are durable but cause hand fatigue on long days. Cork is the classic choice for good reason, and that’s what I’d recommend for anything beyond casual day hiking.
Budget entry point for a functional aluminum pair runs about $40 to $60. Mid-range carbon options start around $120. While you won’t need to spend $200-plus to get a high-performance pole, you will need a handful of dollars more than the absolute floor — the $25 bargain bin pairs tend to have wobbling locking mechanisms that fail at inconvenient moments. Anything in the $50 to $150 range will perform well across years of regular use.
Buy based on what your hiking actually looks like. Not what looks impressive in a gear photo.



Stay in the loop
Get the latest trail rise updates delivered to your inbox.